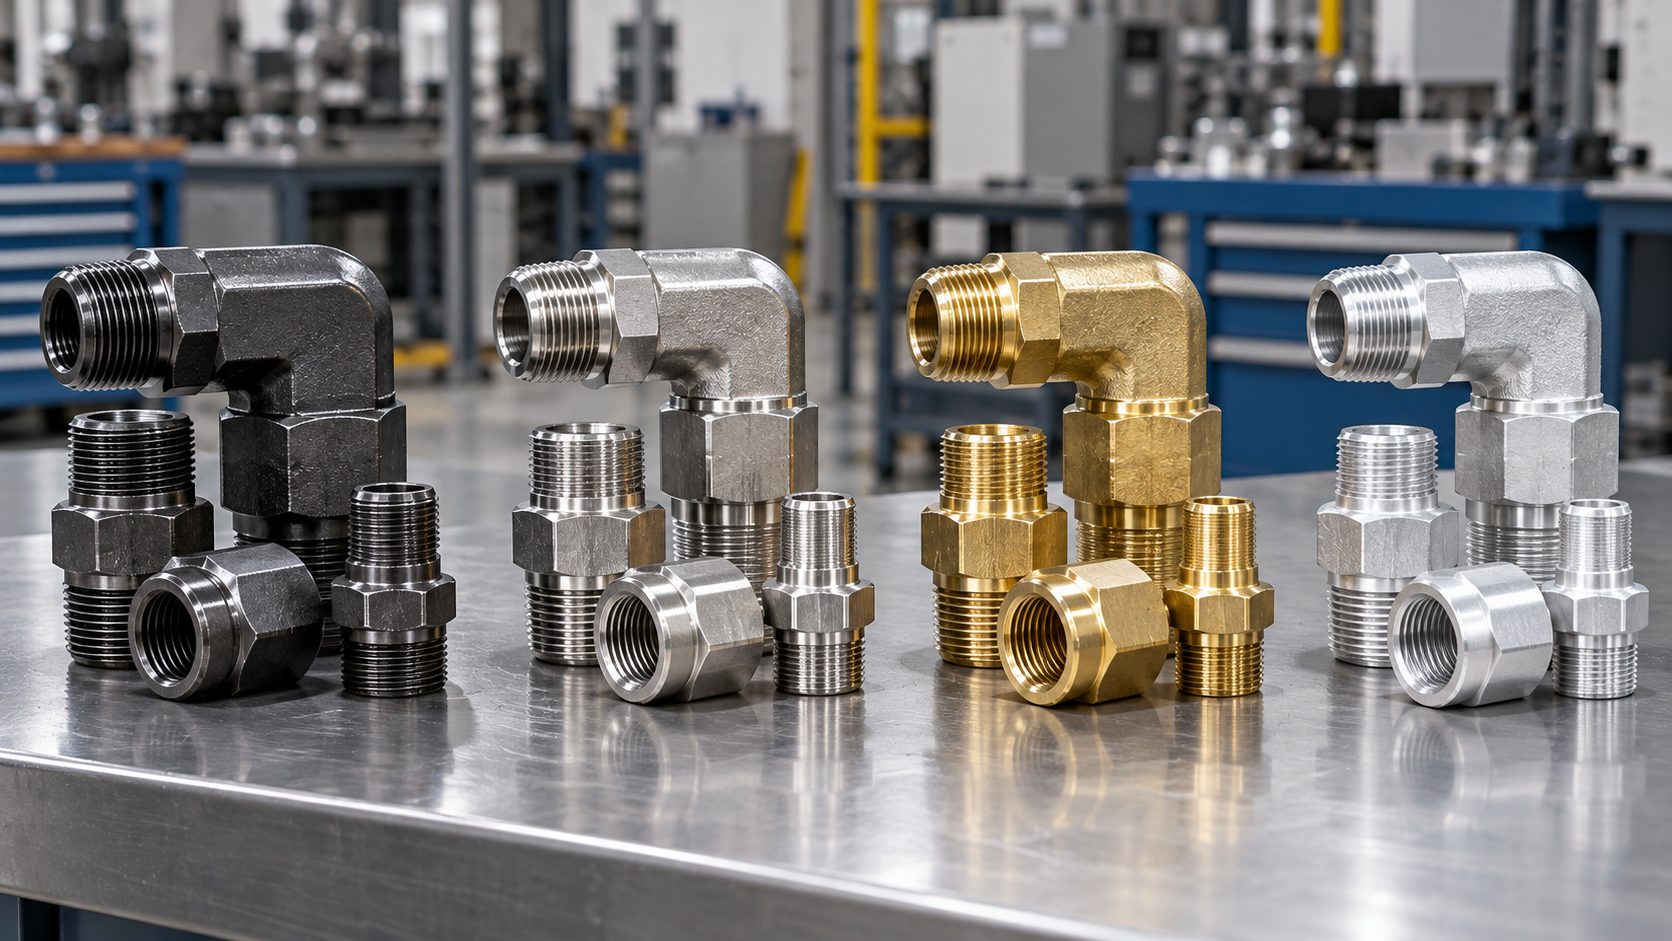
Hydraulic hose fittings should be attached by matching the correct hose and fitting, preparing a clean square hose end, assembling each component according to its specified dimensions, securing the connection correctly, and testing the finished assembly before service. A suitable hydraulic fitting connection depends on much more than simply pushing a fitting into a hose and tightening it.
Picture a maintenance team replacing a damaged hose on an excavator during a busy shift. The new assembly looks fine, yet a few hours later oil appears around the fitting because the hose was cut unevenly, the fitting was installed at the wrong depth, or the connection was overtightened. You can avoid that repeat work by treating hose fitting attachment as a controlled process rather than a quick mechanical task.
1. How Do You Choose the Right Hydraulic Fitting?
The correct hydraulic fitting must match the hose size, hose construction, pressure rating, connection standard, fluid, and operating environment. Start with technical compatibility because even excellent installation cannot compensate for an incorrectly specified component.
Image Brief: Photorealistic industrial workbench with several hydraulic hose fittings, hydraulic hose samples, specification sheets, digital calipers, and pressure data. All components fully visible.
What specifications should you confirm?
Here’s where a reliable assembly begins. Check the hose and fitting as one matched connection rather than purchasing each part independently.
- Hose inside diameter
- Hose outside diameter
- Working pressure
- Thread type
- Seal design
- Fitting material
- Hose construction
- Fluid compatibility
A distributor or maintenance company should record these parameters in the purchasing specification so replacement parts remain consistent across future orders.
Can similar fittings still be incompatible?
This catches many buyers by surprise. Fittings that look almost identical can use different stems, ferrules, threads, or sealing surfaces.
- Compare thread pitch.
- Check seat angle.
- Confirm stem dimensions.
- Verify fitting series.
- Review pressure requirements.
Key Takeaway: You save considerable troubleshooting time when fitting selection begins with complete application data rather than appearance.
| Check | What You Need |
|---|---|
| Hose size | Matching fitting size |
| Pressure | Suitable component rating |
| Thread | Correct mating standard |
| Seal | Matching sealing geometry |
| Material | Suitable working environment |
These checks establish a reliable starting point before hose preparation begins.
2. How Should You Inspect Hydraulic Hose Fittings?
A hydraulic fitting should be inspected together with the hose before assembly to identify damage, contamination, corrosion, deformation, or other conditions that could compromise the connection. Clean components also help prevent foreign material from entering a hydraulic circuit during assembly.
Image Brief: Photorealistic quality inspector examining a hydraulic hose fitting and hose end beneath bright inspection lighting, with magnifier and clean industrial bench.
What defects should you look for?
A few seconds of inspection can prevent hours of repair. Examine both external surfaces and areas that will become hidden after assembly.
- Cracked hose cover
- Corroded fitting body
- Damaged threads
- Scratched sealing face
- Deformed ferrule
- Dirt inside the fitting
- Metal particles inside the hose
The reference process specifically emphasizes checking hoses and fittings before attachment and removing contamination that could enter the hydraulic system. (Hyspeco)
Why does cleanliness matter?
This part deserves more attention than it usually gets. Hydraulic contamination can originate during cutting and assembly, long before machinery begins operating.
- Keep fittings capped before use.
- Clean work surfaces regularly.
- Remove cutting debris.
- Protect open hose ends.
- Avoid placing fittings directly on dirty floors.
Key Takeaway: Inspection is inexpensive quality control that helps you reject damaged components before they become part of a finished assembly.
| Inspection Area | Warning Sign |
|---|---|
| Hose cover | Cracks or abrasion |
| Threads | Deformation |
| Sealing face | Scratches |
| Fitting body | Corrosion |
| Internal passage | Dirt or debris |
Reject questionable components before proceeding to the next production stage.
3. How Should You Cut Hose for a Hydraulic Fitting?
A hydraulic fitting requires a hose end that has been cut cleanly and squarely at the specified assembly length. An angled or damaged cut can interfere with insertion, ferrule positioning, and the finished hose dimensions.
Image Brief: Photorealistic hydraulic hose cutting station showing a professional hose cutting machine producing a straight clean hose end.
What makes a good hose cut?
The goal is simple: clean and square. Use equipment designed for hydraulic hose rather than improvised cutting tools.
- Measure the required hose length.
- Mark the cutting position.
- Hold the hose securely.
- Make a perpendicular cut.
- Inspect the finished edge.
- Remove loose reinforcement material.
The source article likewise recommends using an appropriate hose cutter and avoiding damaged or irregular edges that could affect fitting attachment. (Hyspeco)
Why can cutting accuracy affect final length?
Here’s a purchasing detail worth remembering. The hose cut length and finished assembly length are not always the same because fitting dimensions contribute to overall length.
- Record fitting length.
- Account for insertion depth.
- Check assembly drawings.
- Measure finished assemblies.
- Keep cutting tolerances controlled.
Key Takeaway: Accurate cutting improves both attachment quality and dimensional consistency, which matters greatly for OEM hose assemblies produced in repeat batches.
| Cutting Check | Target |
|---|---|
| Cutting angle | Square |
| Hose length | Drawing specification |
| Cut surface | Clean |
| Reinforcement | No loose strands |
| Internal bore | Clear |
A clean cut gives the fitting a predictable surface for the next assembly stage.
4. How Do You Clean the Hose Before Installing Fittings?
A hydraulic fitting should be installed only after the hose end has been cleaned and any cutting residue has been removed. Hose cutting can leave rubber fragments, reinforcement particles, and other debris that should not enter sensitive hydraulic components.
Image Brief: Photorealistic technician cleaning the inside of a freshly cut hydraulic hose at a professional hose assembly station.
What should you remove after cutting?
Look closely at the fresh cut. Small particles may remain even when the hose appears clean from the outside.
- Rubber debris
- Wire fragments
- Dust
- Cutting residue
- Loose cover material
- Foreign particles
Cleaning the cut end and removing irregular material is one of the specific preparation steps highlighted by the reference article. (Hyspeco)
How should you protect cleaned hoses?
Clean preparation means little if contamination returns immediately. Protect prepared components until assembly.
- Cap open hose ends.
- Store hose away from grinding operations.
- Keep fittings covered.
- Use dedicated clean benches.
- Separate dirty repair parts from new components.
Key Takeaway: A clean hose assembly helps protect valves, pumps, cylinders, and other downstream hydraulic components from assembly-related contamination.
| Contamination Source | Preventive Action |
|---|---|
| Cutting debris | Clean after cutting |
| Workshop dust | Cap hose ends |
| Dirty fittings | Inspect before use |
| Metal particles | Clear hose bore |
| Storage exposure | Use protective plugs |
Cleanliness should remain part of the production process rather than a final cosmetic check.
5. Which Tools Should You Use for a Hydraulic Fitting?
The correct hydraulic fitting installation tools depend on whether the fitting uses a crimped, reusable, threaded, or push-on connection. Proper tooling helps apply controlled force while protecting threads, sealing surfaces, ferrules, and hose reinforcement.
Image Brief: Photorealistic professional hose assembly workstation containing hose cutter, crimping machine, dies, torque wrench, caliper, and hydraulic fittings.
Which tools belong in an assembly station?
Having the right equipment changes the result. Prepare tooling before beginning production.
- Hose cutting machine
- Hydraulic crimper
- Correct die set
- Digital caliper
- Torque wrench
- Open-end wrenches
- Insertion-depth gauge
- Cleaning equipment
The reference article specifically recommends correct assembly tools because unsuitable tools can damage fittings and compromise sealing. (Hyspeco)
Why should measurement tools stay nearby?
Assembly does not end when the machine stops. Measuring tools allow operators to verify completed work instead of assuming it meets specifications.
- Measure finished crimp diameter.
- Confirm hose length.
- Check fitting orientation.
- Verify insertion marks.
- Record production results.
Key Takeaway: Appropriate tooling makes hose assembly repeatable. That becomes especially valuable for B2B distributors and OEM customers ordering hundreds of identical assemblies.
| Tool | Primary Purpose |
|---|---|
| Hose cutter | Square cutting |
| Crimper | Secure hose fitting |
| Caliper | Dimension verification |
| Torque wrench | Controlled tightening |
| Gauge | Assembly verification |
Controlled tooling turns operator skill into a repeatable manufacturing process.
6. Why Must You Follow Hydraulic Fitting Specifications?
A hydraulic fitting should be assembled according to the applicable hose and fitting specifications because insertion dimensions, crimp settings, torque requirements, and allowable combinations can differ between product families. One installation setting should never be assumed suitable for every fitting.
Image Brief: Photorealistic technician comparing hydraulic fitting specifications on a production sheet while setting a digital hydraulic crimping machine.
Which assembly values should you verify?
This is where documentation earns its value. Keep technical data accessible at each hose assembly station.
- Hose series
- Fitting series
- Ferrule model
- Crimp diameter
- Insertion depth
- Torque requirement
- Pressure rating
- Applicable size
The reference source also stresses following the applicable component guidelines rather than assuming every hose and fitting requires the same attachment procedure. (Hyspeco)
Should B2B buyers request crimp data?
Yes, especially when qualifying a supplier. Technical documentation provides a clearer basis for evaluating production capability.
- Request assembly drawings.
- Review dimensional tolerances.
- Confirm material specifications.
- Ask about inspection records.
- Compare sample measurements.
Key Takeaway: Written specifications reduce operator guesswork and give purchasing teams measurable criteria for approving hydraulic hose assemblies.
| Specification | Why It Matters |
|---|---|
| Crimp diameter | Controls fitting retention |
| Insertion depth | Controls fitting position |
| Torque | Protects threaded connection |
| Pressure rating | Matches application |
| Hose/fitting series | Confirms compatibility |
Good production records also make repeat orders easier to reproduce.
7. How Should You Align a Hydraulic Fitting?
A hydraulic fitting should be aligned so the finished hose follows its natural routing without unnecessary twist, sharp bends, or side loading. Correct orientation becomes especially significant when assembling elbows or fittings at both ends of one hose.
Image Brief: Photorealistic technician aligning two elbow hydraulic hose fittings on a hose assembly using an orientation fixture and angle gauge.
Why does orientation matter?
A fitting can be technically correct and still be installed badly. Incorrect orientation forces the hose into an unnatural position after installation.
- Avoid hose twisting.
- Respect minimum bend radius.
- Position elbow fittings correctly.
- Allow movement where machinery articulates.
- Keep hoses away from abrasion points.
The source article similarly highlights alignment as a way to reduce kinking and unwanted stress around hoses and fittings. (Hyspeco)
How can you control elbow orientation?
For repeat production, don’t rely on eyesight alone. Use reference marks or fixtures when orientation matters.
- Mark a centerline on the hose.
- Record fitting angles.
- Use an orientation fixture.
- Verify both ends before crimping.
- Compare finished parts with drawings.
Key Takeaway: Correct orientation reduces installation stress and helps OEM customers receive assemblies that fit their machinery without field adjustment.
| Alignment Problem | Possible Result |
|---|---|
| Hose twist | Premature fatigue |
| Wrong elbow angle | Difficult installation |
| Tight bend | Reduced hose life |
| Side loading | Fitting stress |
| Poor routing | Abrasion |
Alignment should therefore be inspected before the finished assembly leaves production.
8. How Tight Should Hydraulic Hose Fittings Be?
A hydraulic fitting should be tightened according to the specified connection and torque requirement rather than tightened as hard as possible. Excessive torque can damage threads or sealing surfaces while insufficient tightening can allow movement or leakage.
Image Brief: Photorealistic technician using a calibrated torque wrench on a hydraulic hose connection inside industrial equipment.
Why should tightening be controlled?
More force does not automatically mean a better seal. Different connection designs achieve sealing in different ways.
- Follow prescribed torque values.
- Tighten connections evenly.
- Protect sealing faces.
- Avoid cross-threading.
- Stop if unusual resistance appears.
Gradual and controlled tightening is also a central recommendation in the reference article, which warns that excessive tightening can damage fittings and contribute to leakage. (Hyspeco)
Does every fitting need the same torque?
No, and this distinction matters. Material, size, thread design, seal type, and manufacturer specifications may change tightening requirements.
- Identify the connection standard.
- Check fitting size.
- Confirm material.
- Review torque specifications.
- Use calibrated tools where required.
Key Takeaway: Controlled tightening protects expensive mating components and produces more consistent connections across multiple technicians or production shifts.
| Tightening Condition | Possible Outcome |
|---|---|
| Too loose | Leakage |
| Correct | Reliable connection |
| Too tight | Thread or seat damage |
| Cross-threaded | Connection failure |
The target is correct assembly—not maximum wrench force.
9. How Do You Test an Installed Hydraulic Fitting?
An installed hydraulic fitting should be checked for correct assembly and leakage before the hose enters normal service. Inspection may include dimensional checks, visual examination, pressure testing, or other procedures appropriate for the application.
Image Brief: Photorealistic enclosed hydraulic hose pressure-testing station with pressure gauge, completed hose assembly, fittings, and safety shielding.
What should you inspect before pressure testing?
Testing starts before pressure enters the hose. Complete visual and dimensional checks first.
- Verify fitting position.
- Check crimp diameter.
- Confirm orientation.
- Inspect threads.
- Examine ferrule placement.
- Review finished hose length.
The reference article recommends testing after fitting attachment and inspecting connections for leakage before returning the hydraulic system to service. (Hyspeco)
What should happen if a leak appears?
Never treat a leak as something to ignore or casually tighten under pressure. Depressurize the system before inspecting or correcting the connection.
- Stop the test.
- Release stored pressure.
- Identify the leak location.
- Inspect sealing surfaces.
- Check component compatibility.
- Replace damaged components.
Key Takeaway: Final testing provides one last barrier between an assembly mistake and costly downtime at your customer’s facility.
| Test Point | What to Confirm |
|---|---|
| Crimp | Correct dimension |
| Hose | No damage |
| Orientation | Matches drawing |
| Connection | No leakage |
| Assembly length | Within tolerance |
A documented final inspection also gives B2B buyers stronger quality records.
10. How Do You Maintain Hydraulic Hose Fittings?
A hydraulic fitting should remain part of your preventive maintenance program after installation because vibration, pressure cycling, corrosion, abrasion, and environmental exposure can change its condition over time. Periodic inspection helps identify problems while equipment remains serviceable.
Image Brief: Photorealistic maintenance engineer inspecting hydraulic hose fittings on an excavator with checklist, flashlight, and protective gloves.
What should routine inspections cover?
Don’t wait until hydraulic oil reaches the floor. Look for early signs of deterioration.
- Oil seepage
- Surface corrosion
- Damaged threads
- Hose abrasion
- Loose connections
- Cracks
- Hose movement
- Damaged protective covers
Regular inspection and maintenance form the tenth step in the reference article’s process, including replacement of worn components and keeping maintenance records. (Hyspeco)
Why should maintenance records be kept?
For fleet operators and distributors, history provides useful evidence. Records can reveal recurring failure locations and help purchasing teams improve future specifications.
- Record installation dates.
- Track replacement frequency.
- Record failure locations.
- Note fitting specifications.
- Document maintenance activity.
- Compare service life.
Key Takeaway: Maintenance data turns individual fitting failures into information you can use to improve hose routing, component selection, and future purchasing decisions.
| Record | Business Value |
|---|---|
| Installation date | Tracks service life |
| Part specification | Simplifies reorder |
| Failure location | Identifies patterns |
| Inspection result | Supports maintenance |
| Replacement date | Improves planning |
A consistent maintenance record helps reduce unexpected breakdowns and emergency purchases.
Final Thoughts
Correctly attaching hydraulic hose fittings requires a controlled sequence: select compatible components, inspect them, cut and clean the hose properly, use appropriate tools, follow assembly data, control alignment and tightening, then inspect and test the finished assembly.
For a maintenance business, hydraulic distributor, equipment manufacturer, or repair workshop, these steps solve several practical problems at once. They help reduce incorrect assemblies, leaks, repeated repair labor, emergency purchasing, and avoidable equipment downtime.
TOPA supplies hydraulic hose fittings, adapters, ferrules, hoses, and customized hydraulic connection components for B2B customers. If you need help matching a fitting from a drawing, existing sample, hose specification, or thread measurement, contact us today with your requirements.
Reliable hydraulic connections begin long before pressure enters the system. They begin with accurate specifications, controlled assembly, and components manufactured for the job.
FAQ
Can I attach hydraulic hose fittings without a crimping machine?
Yes, but only for fitting systems specifically designed for field or reusable assembly. Standard crimp fittings require the appropriate crimper, dies, hose, ferrule, and crimp specification.
What’s the best way to cut a hydraulic hose?
A dedicated hydraulic hose cutting machine provides the most controlled result. The cut should be clean and square without excessive deformation or loose reinforcement material.
How do I know if my hydraulic fitting is crimped correctly?
Check the finished crimp diameter against the applicable specification and inspect fitting position, hose condition, and orientation. A dimensional inspection provides more reliable evidence than visual appearance alone.
Can I reuse a crimped hydraulic hose fitting?
No, a permanently crimped fitting should generally be treated as part of the completed hose assembly rather than removed and crimped onto another hose. Reusable fittings are a separate fitting design intended for appropriate hose systems.
How do I know if a hydraulic hose fitting is leaking?
Look for oil around the connection during an appropriate inspection or test. If leakage appears, depressurize the system before examining fitting compatibility, sealing surfaces, torque, hose condition, or assembly quality.